

How to Make a T-Shirt Quilt
By ShirtSpace | Feb 02, 2023 | Updated Jan 25, 2024Wondering how to make a t-shirt quilt? A t-shirt quilt is a great way to preserve memories and display your favorite t-shirts all at the same time! Making a quilt might seem like a daunting task, but it's actually relatively simple. All you need is a stack of your favorite t-shirts, some batting, and some fabric for the backing and binding. In this article, we'll break down everything you need to know, so you can learn how to make a t-shirt quilt.
Step One: Gather Your Supplies
First things first, you'll need to gather all of your supplies. In addition to your t-shirts, you'll need batting, fabric for the backing, and fabric for the binding. You can use brand-new wholesale tees, or ones that you already have in your drawer. If you're not sure how much material you'll need for the backing and binding, don't worry! The folks at your local fabric store will be more than happy to help you calculate how much you'll need based on the size of your t-shirt quilt. Or you can use an online backing and batting calculator to get a rough estimate.
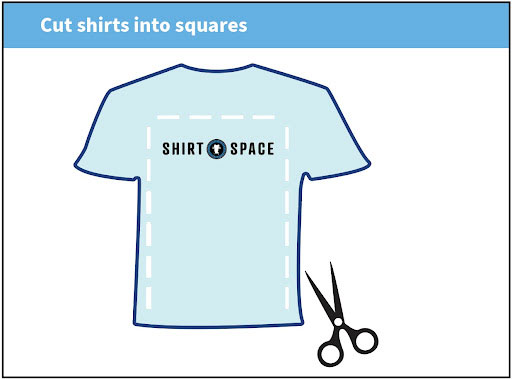
Step Two: Cut Your T-Shirts Into Squares
Once you have all of your supplies, it's time to start cutting those t-shirts into squares! The size of the squares will depend on the size of the finished t-shirt quilt that you want. For example, if you want each block in your quilt to be a 12-inch square, then you'll need to cut each t-shirt into 12-inch squares. Don't worry if they're not perfect – this is a t-shirt quilt, not a competition! Just make sure that all of your squares are roughly the same size, and use a tool, like a rotary cutter, to make sure that all of your edges are straight and clean.
Step Three: Lay Out Your Squares
Now that all of your squares are cut, it's time to start layering them. Begin by placing one square in the center of your work surface. Then, add a square to each side of that center square until you have a row of five squares. Continue adding rows of five squares until you have a total of 30 squares – this will be enough for a twin-sized t-shirt quilt. Once you've laid out all of your squares, it's time to start sewing!
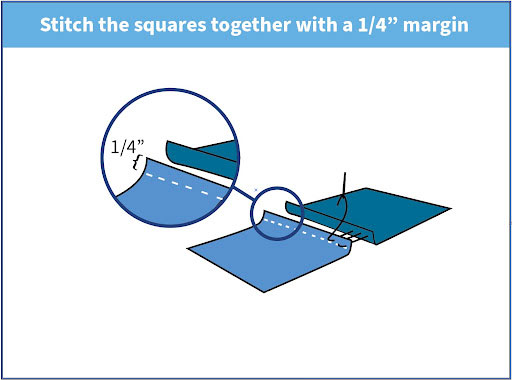
Step Four: Sewing The Row Together
To sew the rows together, simply place two squares right sides together and sew along one edge with a 1/4 inch seam allowance. Continue sewing pairs of squares together until all the squares in each row are sewn together. Then, use a length of thread or ribbon to mark the order in which the rows should be sewn together before moving on to step five.
Step Five: Adding Batting
The next step is to add batting so that your tshirt quilt will be warm and cozy. First, lay out a piece of batting on top of your work surface – this will be sandwiched between the top of your quilt (the part with all the t-shirt squares) and the back. Trim off any excess batting so that it's roughly the same size as your top rectangle.
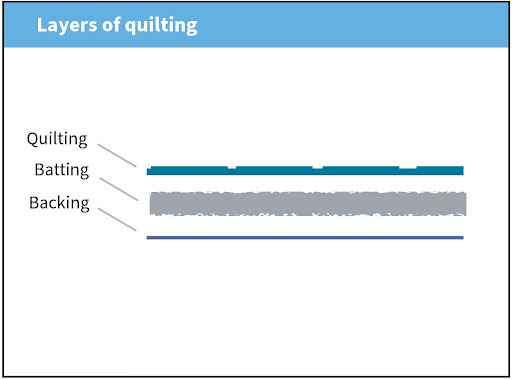
Step Six: Adding Backing to Your T-Shirt Quilt
The next step when learning how to make a t-shirt quilt is to lay out the fabric backing on top of the batting – this will be on the underside of your quilt when it's finished. Again, trim off any excess fabric so that it's roughly the same size as everything else. Now comes the moment of truth – sewing it all together! Place your top rectangle on top of everything else with the right sides facing up and begin pinning everything in place along one edge. Sew all layers together with a 1/2 inch seam allowance, and then trim off any excess fabric or batting.
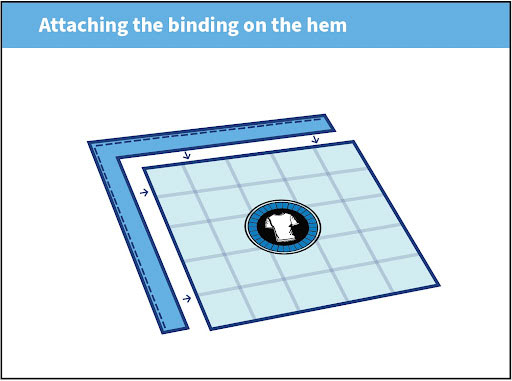
Step Seven: Binding The T-Shirt Quilt
The final step in how to make a quilt from t-shirts is to bind the quilt. To do this:
-
Cut a length of binding fabric that's long enough to go around the entire perimeter of your quilt, plus an additional 2 inches for seam allowance
-
Pin it in place along one edge of the quilt and then sew it in place with a ¼-inch seam allowance
-
Once your binding is sewn on, trim off any excess fabric, and you're finished with your t-shirt quilt!
You now have a beautiful t-shirt quilt that's perfect for snuggling up in – enjoy!
Now That You Know How to Make a T-Shirt Quilt
If you're wondering how to make a t-shirt quilt, the answer is surprisingly simple! All you need are some basic sewing supplies and a few t-shirts, and you can make a quilt that's perfect for snuggling up in. Plus, cutting and sewing the squares together is quite therapeutic – it's a great way to relax after a long day. Or throw a party and teach your friends how to make a t-shirt quilt. So, why not give t-shirt quilts a try? You won't regret it!
Looking for more creative t-shirt projects outside of making t-shirt quilts? Why not consider DTF printing, learning how to tie-dye, or cutting up tees for DIY off-shoulder t-shirts? The possibilities are endless when it comes to ways to customize or repurpose apparel!
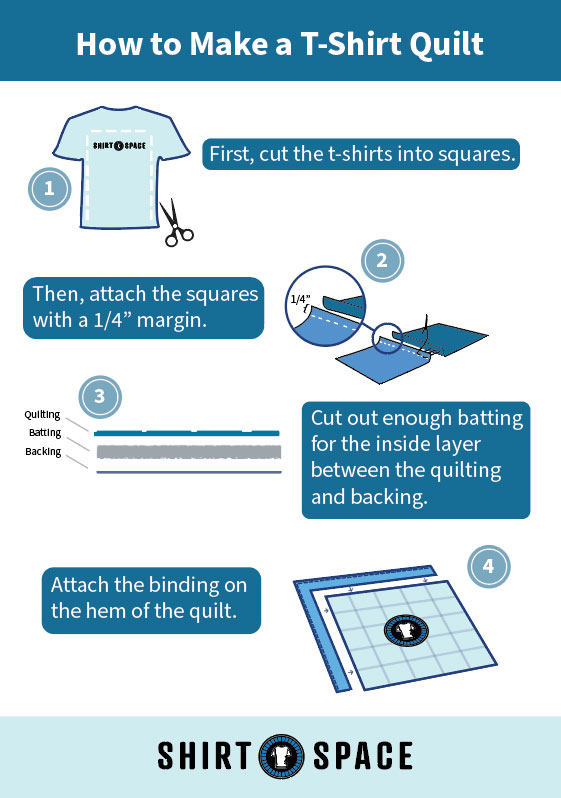
T-Shirt Quilt Making Infographic
Leave a Comment
We take your privacy seriously and will not share or publish your email address.
This site is protected by reCAPTCHA and the Google Privacy Policy and Terms of Service apply.