

How To Screen Print on T-Shirts
By ShirtSpace | Aug 23, 2019 | Updated May 15, 2024Screen printing is a little more complicated than using vinyl or iron-on transfers, but the results can be spectacular. You don’t always need a fancy setup — you can always learn how to screen print shirts at home. If you want to learn how to screen print, then read on because this how-to guide on screen printing for beginners is just for you!
Hero image credit: primipil
Instead of adhering an image to the surface of a shirt using transfer paper and an iron, screen printing uses a stencil and ink that is printed directly onto the shirt through a screen to create the image. The result is a shirt with an image printed on top of its fibers. We will explain exactly how to screen print a shirt, but first, you may be wondering, “what do you need to screen print”? We’ve compiled a comprehensive list.
Screen Printing Materials You Will Need
-
Printing screen and frame (available at craft stores)
-
Photo emulsion and sensitizer (also available at craft stores)
-
A desk lamp
-
A 250-watt bulb or 500-watt halogen light
-
Latex/latex-free gloves
-
A dark room
-
Stiff squeegee
-
Silk screen fabric ink
-
A piece of cardboard slightly larger than your design
-
Black garbage bags
-
Inkjet or laser transparencies
-
Heat gun

Image credit: Thaisign from Getty Images
It’s always good to have extra supplies, on hand, especially shirts and ink, since it may take a few trial runs to get it down. The more you experiment, the more you will perfect your method!
How to Screen Print T-Shirts
DIY screen printing doesn’t have to be complex. Once you gather the needed supplies, with a little practice and possibly some trial and error, you will have created your own custom screen-printed design on a t-shirt! But before we start the actual screen printing part, we need to make some preparations.
Finding the Proper Place to Screen Print
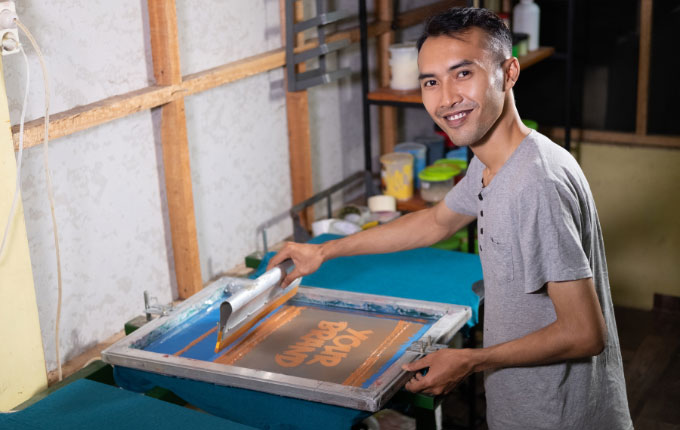
Image credit: Odua Images
If you are wondering how to screen print at home, just make sure you find a place that will be undisturbed of animals or small children. This is to prevent mishaps with the ink, chemicals, equipment, heat gun, etc. A lot of people like to start screen printing in their garages or spare rooms. Just keep in mind that a space that is too cold will not always allow for proper drying. You will also need a space that you can make dark for when you make your screen, but more on that later.
Preparing Your Artwork To Be Screen Printed
When learning how to screen print t-shirts, sometimes beginners forget that there is basic design knowledge required to get great prints, which is why practice is essential for a quick and seamless process. Create your artwork using Adobe Photoshop or other artwork editing software. For beginners, we recommend starting with a single-color image such as block text or a silhouette (as pictured below).
.jpg)
Simplistic single-color design that is suitable for beginning screen printers.
Image credit: Odua Images
More advanced screen printers can experiment with multiple colors. Using a multicolor image will require you to use artwork editing software to separate the image into layers, with each layer representing the multiple colors of the image. Single-color images only have one layer and do not require separating into layers.

Advanced screen print that took multiple layers of colors to achieve
Image source: Yasamine June
Print each individual layer of your image onto a clear transparency using black ink. The easiest way to do this is to print your transparencies using an inkjet or laser printer. Make sure the black ink is really dark and opaque.
Preparing the Screen for Printing
It is very important that you prepare your screen in a light-safe room that is free from UV rays. To do this, pick up a yellow bug light from your local hardware store and swap out your standard light bulb. This will allow you to have light, but will not pre-expose your screens until you’re ready.
1. Create Your Emulsion Mixture
Wearing gloves, mix the emulsion and sensitizer together according to the manufacturer’s instructions. Remember that this must be done in a light safe space!
2. Apply Emulsion
Now, there are a couple of ways to coat your screen with emulsion. The first is to put down a black garbage bag and lay your screen and frame on it. Then, pour enough emulsion on your screen to coat it completely, and use your squeegee to evenly spread it across the screen.
Another, more efficient way to coat your screen with emulsion is to fill a scoop coater with emulsion, use a screen coating stand, and coat both sides of your screen with emulsion. The emulsion should cover as much of your screen as possible, and must be a larger area than the image you’ll be printing. When you’re finished, you should have a thin, even layer of emulsion.
3. Let Your Screen Dry
Let the screen dry for no less than 4 hours, but ideally for 12–24 hours.
4. Exposing The Image
Now, you’re going to need a very dark room free from UV rays. A closed closet works, as does a dark bathroom with a small yellow bug light. If your room has windows, make sure and cover them with black plastic bags to prevent light from getting in.
If you do not have an exposure unit specific for screen printing, there are a couple of options to expose your image onto your screen. First, lay your emulsion-coated screen on a black surface with the emulsion coating facing up. Next, tape the image transparency reversed on top of the emulsion. Some printers additionally secure the transparency using a piece of flat glass, as this helps reduce any space between the transparency and the screen. This is called positive contact, and it helps prevent light from creeping in between your transparency and your emulsion-coated screen. Using glass from a picture frame is an easy way to do this!
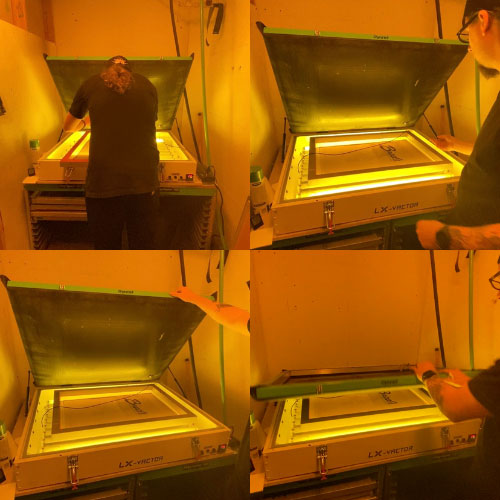
Images from our visit to Printera Co..
Now, if you’re using a lamp with the 250-watt bulb, position it so that it’s one or two feet away from the image (make sure the lamp you use can handle that much wattage to reduce the risk of fire or electrical shorts). Angle the lamp so that the light directly shines on the image, and leave the room for about 10 – 15 minutes. Keep in mind, the closer the light is to your screen, the less amount of time you need to expose it. This will take some time to dial in your exposure times!
For a quicker exposure with less variance, use a 500-watt halogen light, position it 16 inches above the center of your screen, and expose it for 12 minutes 30 seconds to 13 minutes 30 seconds. If you’re using an image with multiple colors, repeat this process with each transparency that represents the colors of your image.
5. Rinse the Screen
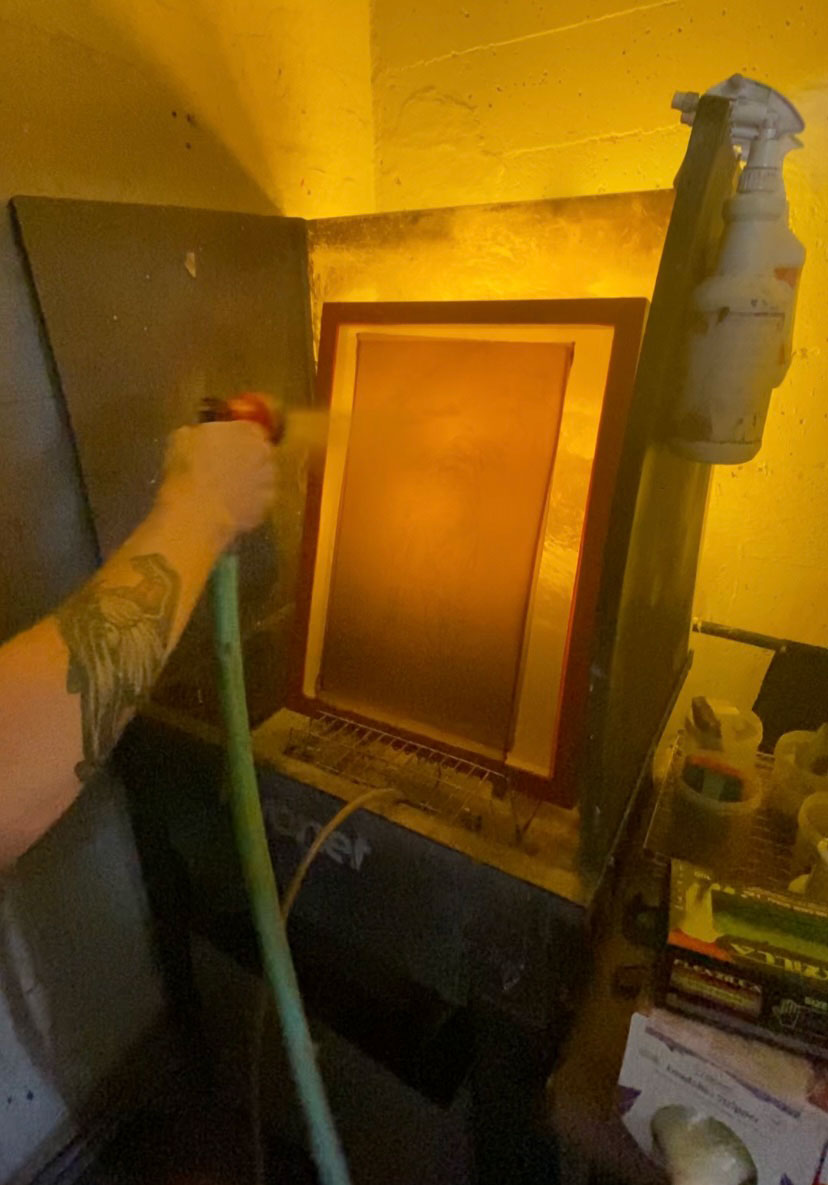
Image from our visit to Printera Co..
As you do so, you’ll see the emulsion rinse off where the exposed image is. Continue rinsing until the burned emulsion has washed off completely and you can see the image clearly.
6. Dry the Screen
Let the screen dry completely. Using a blow-dryer can speed this process up, but be careful not to get too close to your screen when using a dryer.
7. Tape the Edges
Next, using tape, tape the perimeter of the screen that doesn’t include the image and is not covered with emulsion. This prevents the screen printing ink from passing through the mesh or silk screen and getting on your shirt in areas that you don’t want it to.
How to Screen Print
Screen Printing Steps
1. Align Your Screen and lay the shirt on a flat surface, placing the stiff cardboard or plastic insert inside the shirt and directly under where the image will be printed. Align the screen over the shirt.
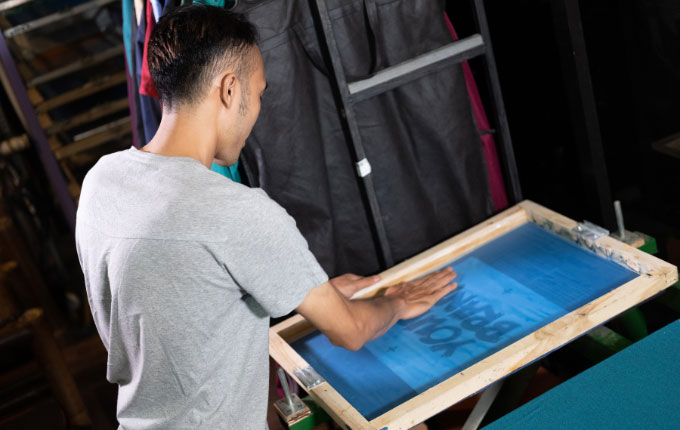
Image credit: Odua Images
2. Pour a small line of ink across the top of the screen.
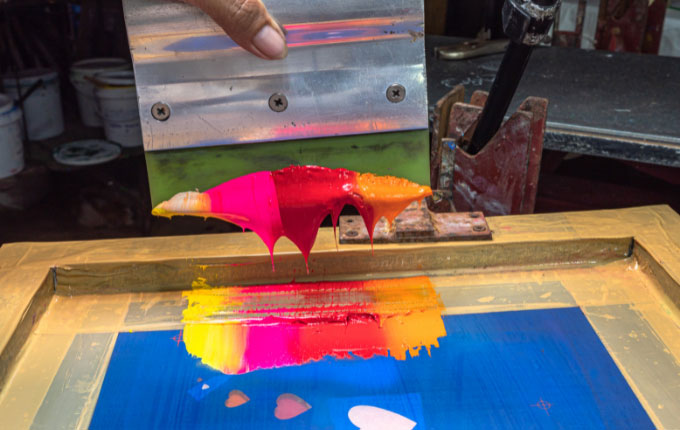
Image credit: Thaisign from Getty Images
3. Using the squeegee, pull the ink down the screen in a smooth motion, maintaining pressure as you do. Even pressure is important and will ensure that the ink passes through the screen and prints your complete image. Pull the squeegee and ink multiple times if needed!
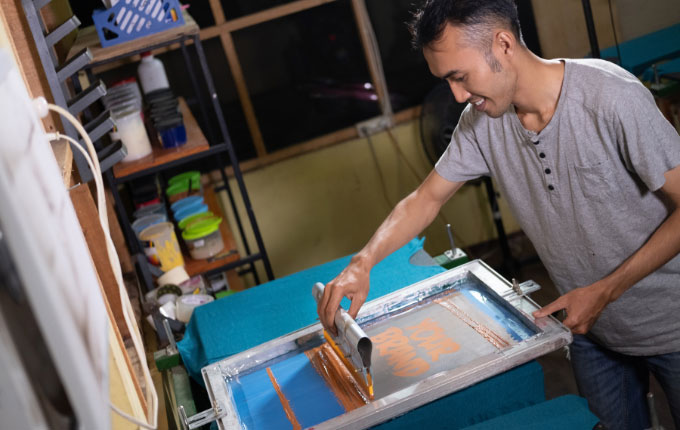
Image credit: Odua Images
4. Now, lift the screen and carefully remove the cardboard from the shirt. If you’re using a single-color image for your screen printing, you’re almost done.
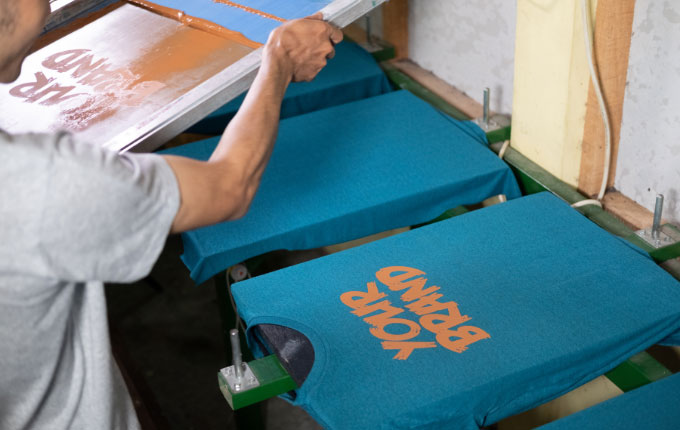
Image credit: Odua Images
Setting the Ink
To set the ink so it doesn’t wash out, you need to use heat to cure the ink to 320 degrees. A heat gun or flash dryer is ideal, but if you don’t have these, you can set the ink by heating an oven to 400 degrees and putting the shirt in for thirty seconds. Make sure to diligently check the process every step of the way to prevent fire. Using an oven is not optimal, so heading to your local hardware store to pick up a heat gun is your best bet. While you’re there, you may also consider grabbing a temp gun that will let you know what temperature your ink is curing at. This is the best way to know that your ink has reached 320 degrees and will not wash out.
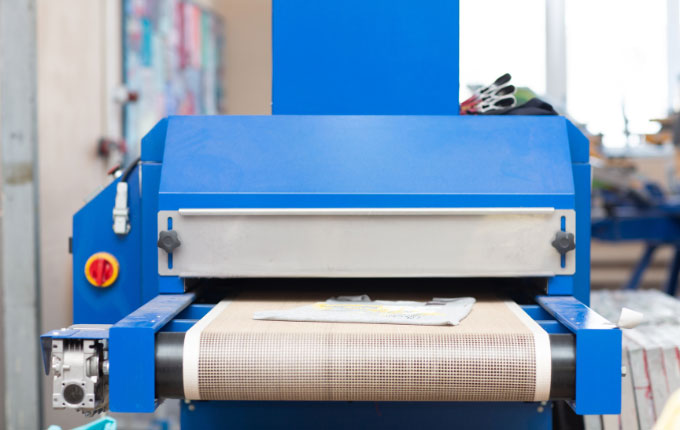
Industrial ink curing machine for garments
Image source: primipil
Do it Again!
If you are screen printing an image with multiple colors, you need to repeat the process of printing and curing your ink for each color in your image. The extremely tricky part is ensuring that each transparency lines up exactly with your previously printed ones. Otherwise, the image will come out misaligned, blurry, and have overlapping colors
What Do I Do With the Screen After?
.jpg)
Image credit: primipil
As for the screen, if you want to use it for more screen printing, you can store it, emulsion and all, in a dark place. After cleaning off all of the ink, black garbage bags work fine for storage. But, If you decide you’d like to use it for another screen printing project, you can clean it with an emulsion remover, dry well, and start over – keeping in mind to follow the emulsion remover instructions closely. Do not let the emulsion remover dry on your screen!
Top Blank T-Shirts For DIY Screen Printing:
Now That You Know How to Screen Print T-Shirts
Image credit: Ivan Martynov from Getty Images
Congratulations! You’ve successfully printed a shirt. Remember not to get discouraged if you are first few attempts are not perfect since practice makes perfect. Once you’ve got the screen printing basics down, you can keep practicing and perfecting your technique! The process of screen printing can be intimidating, but if you start with single colors, practice, and follow the instructions, you’ll soon get the hang of it. Happy printing!
Do you have any helpful tips for those starting their screen printing for beginner's journey? Make sure to share them in the comments below!
Comments
Kapricorn Prints11/05/2025 01:37 pm
The step-by-step breakdown of screen printing in this article is extremely helpful and clear for those who are new to the process.
Reply
ShirtSpace11/05/2025 05:24 pm
Thanks so much for reading our blog. We are glad you found it helpful!
Reply
Jasa Konveksi Bandung02/13/2025 07:34 am
Your article is very inspiring with high-quality content. Warm Regard.
Reply
ShirtSpace02/17/2025 07:10 pm
Hi, Jasa. We are so glad you found value in this blog. Thanks for reading!
Reply
Jasa Konveksi Bandung01/21/2025 08:12 am
Your article is very inspiring with high-quality content. Warm Regard.
Reply
ShirtSpace01/21/2025 05:51 pm
Hi, Jasa. Thank you for reading our blog and your nice message!
Reply
Henry Killingsworth08/02/2023 03:48 pm
You made an interesting point when you mentioned that DIY screen printing doesn't have to be complex. With that in mind, I would think that you would get better quality from professional screen printing. I would think that you could get graphics that last longer if you work with a professional screen printing service.
Reply
ShirtSpace08/24/2023 11:05 pm
Hi Henry! The materials you use can make a big different. From the inks, to the screens, squeegees, apparel used and drying equipment. This is not to say that DIY projects can't turn out just as great, though. Thanks for reading our blog!
Reply
Elina Brooks06/28/2023 08:39 am
Thank you for explaining that screen printing uses a stencil and ink directly printed onto the shirt's fibers to create the image. It's our family reunion this August, and we were thinking of having matching t-shirts for the occasion. I'll be sure to keep this in mind while I get screen printing services to help us make the shirts and have them all ready before the day of the family reunion.
Reply
ShirtSpace06/28/2023 09:18 pm
Hi, Elina. Thank you so much for taking the time to read our blog and comment! Family reunion tees are so special! We hope you have a super fun get-together with your fam! Take care!
Reply
Leave a Comment
We take your privacy seriously and will not share or publish your email address.
This site is protected by reCAPTCHA and the Google Privacy Policy and Terms of Service apply.