

How to Print a Picture on a T-Shirt with Iron-On Transfers
By ShirtSpace | Aug 23, 2019 | Updated Sep 26, 2024Are you an artist looking to bring your designs to life by printing them on blank apparel? Clothing is a great option because people are often mobile - transporting your messages or artwork with them wherever they go. This is a great way for your designs to be seen. Every time someone wears the shirt you designed as their fashion choice, your design gets more exposure! Exposure to friends, family and even people they walk by on the street!
Or perhaps you want to start a small online boutique, a brick-and-mortar shop, your own apparel line or want to create branded merchandise for your business. Maybe you are a craft fanatic and love all things DIY. Whatever the motivation behind the draw, learning how to print a picture on a t-shirt is a great skill to have in your back pocket.
You may have a beautiful piece of artwork or a photo you want to display on a t-shirt, but you are stuck at the question of "how do you get the picture on a shirt?" Thanks to inkjet or laser transfer paper, you can print almost any image to your t-shirt, sweatshirt or any blank apparel. All you need is the image, a printer, some transfer paper, an iron and a quality t-shirt!
Factors That Will Impact Your Success When Learning How to Put a Picture on a Shirt
Shirt Color Matters When Ironing a Picture on a Shirt
The first step in ironing a picture onto a shirt using transfer paper is to consider the color of the shirt. If you are not mindful of these rules, you may end up with too light or dark of an image to distinguish - think contrast! Also always make sure and check your inkjet transfer paper specifications to determine what materials it can be ironed onto. This is very important for best results, especially when first learning how to print a picture on a t-shirt.
How to Print a Picture on a Light-Colored Shirt

Light-colored images will get lost on a light-colored shirt, which is better suited for dark or vibrant colors.
How to Print a Picture on a Dark-Colored Shirt

Dark shirts are better for light-colored images. The light colors will pop against the dark background.
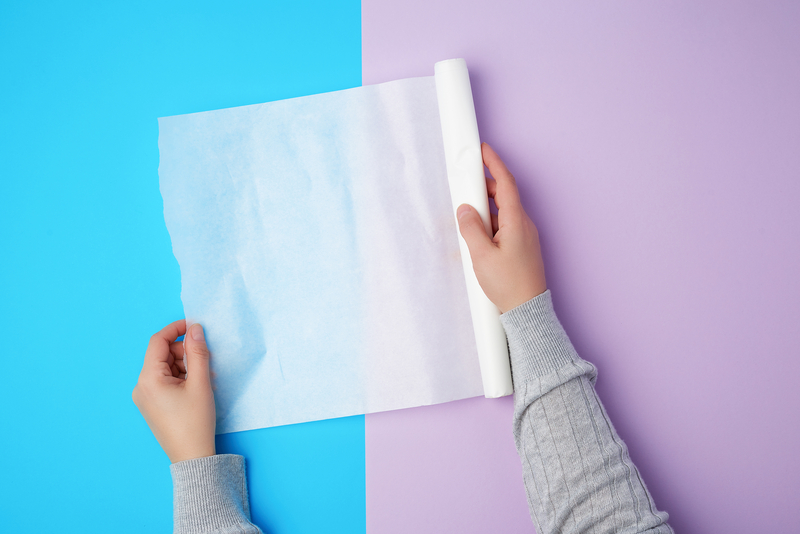
Transfer Paper Choices to Iron a Picture on a T-Shirt
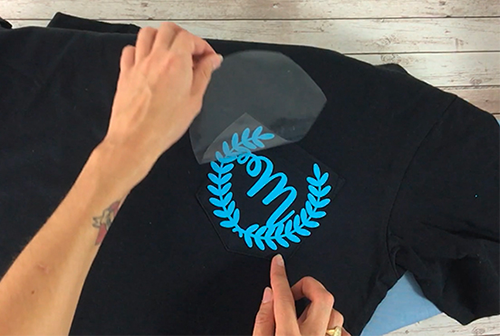
Image source: shopcraftables.com
When to Use Light-Colored Transfer Paper
Shirt color also affects the type of transfer paper you use. For light-colored shirts, choose thin transparent transfers, which make the background appear clear. This does mean any white in your artwork will also be clear, which can be a problem if people in your picture are, say, wearing white t-shirts.
When to Use Dark-Colored Transfer Paper
Dark-colored transfers are thicker, and are intended to be used with black tees or other dark-colored shirts. Dark-colored transfers have a white backing, so white areas of the photo will appear in the finished transfer. This also means that any clear background areas will appear white. While not a problem with most photos, if you’re transferring artwork you may need to carefully cut out clear areas before applying the transfer.
Design & Photo Editing
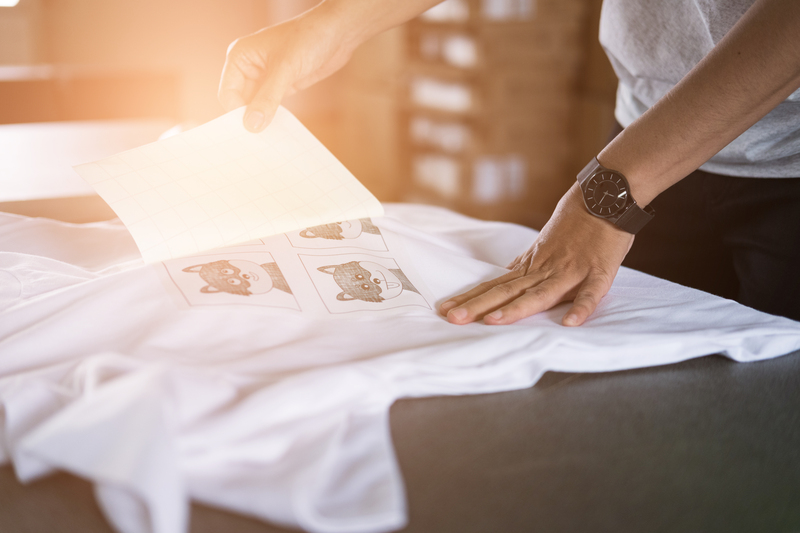
When preparing your artwork, be mindful that you’ll need to use graphic or logo design software to “flip” the image before you put a picture on a shirt – especially if your image includes text or is a photograph. If you don’t do this, the finished product will be a mirror image of the original.
Once printed, trim any excess transfer paper from around the image. Anything left will be transferred onto the shirt when you iron the design on.
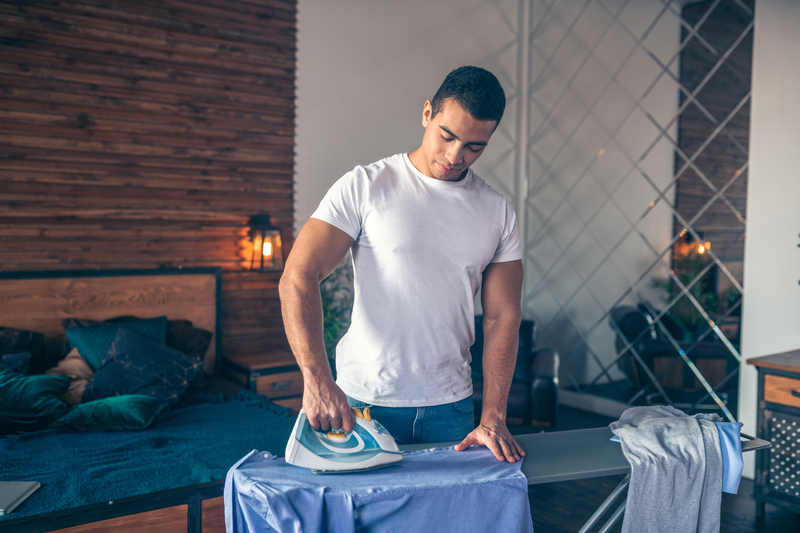
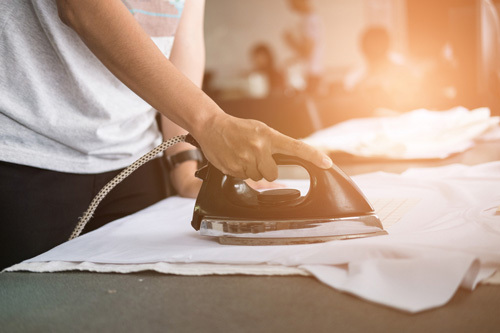
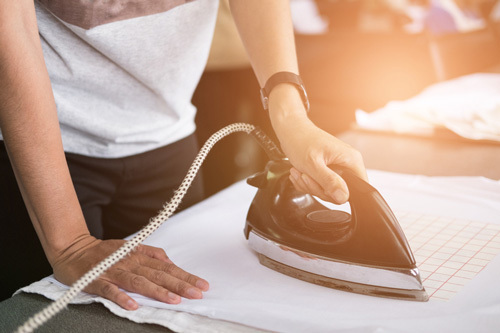
How to Iron a Picture on a Shirt
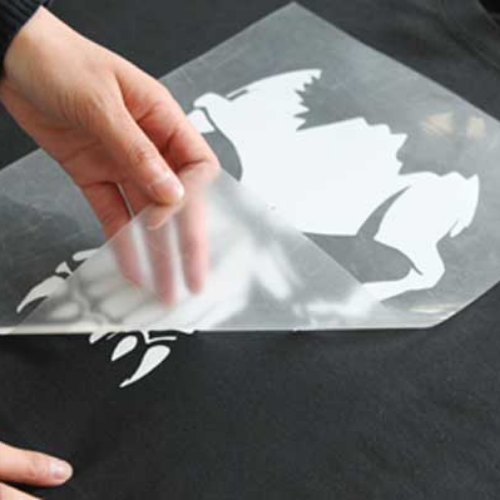
Image source: Heat Press Guide
Prewash the shirt to prevent shrinkage that can cause pulling on the edges of your image when the shirt is washed. Be mindful that even if you purchase preshrunk t-shirts - they may still shrink slightly, so prewashing is still advised. Once dry, place the shirt on a table or other hard flat surface, and iron it to remove any creases or wrinkles. If you do not ensure that the fabric is completely smooth when you go to put a picture on a shirt, then the transfer may come out lumpy, not adhere to the fabric properly, or will not last through multiple washes.
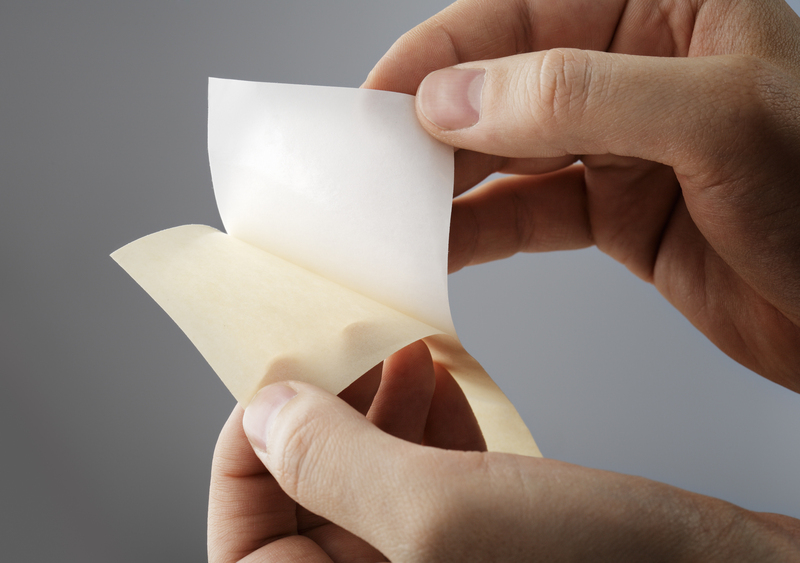
Peel the backing paper off the transfer paper and carefully position the transfer on the shirt. Take your time with this part, so that you have the picture positioned just right.
Using the transfer backing you just peeled off, cover over the top of your transfer paper. This acts as a sort of parchment paper, however you can also use a soft kitchen towel too. Now, heat the iron to the temperature recommended by the transfer manufacturer. Starting in the center of the transfer, gently move the iron in a circular motion to the edges of the image and back again, repeating for as long as the transfer instructions indicate. The process can take three or four minutes.
Depending on the instructions listed for the particular transfers you are using, let the transfer cool completely and then peel the paper back off or peel it while still hot . When you begin to remove the transfer backing, carefully peel up the parchment paper or towel, starting at one edge. Once cooled and the parchment paper is removed, the process is complete!
If you are a visual learner, here are three fantastic YouTube videos that show you how to iron a picture on a tee:
How to Get a Picture on a Shirt: Recap Steps
1. Choose Your T-shirt

Light-colored images are best suited for dark, vibrant colored shirts. Dark images are better for light-colored shirts.
2. Choose Your Transfer Paper
Both inkjet and laser transfer paper are popular. Make sure and check your inkjet transfer paper specifications to determine what materials it can be ironed onto!
3. Prepare Your Artwork

Use photo editing software to “flip” the image if your image includes text or is a photograph. If you don’t do this, the finished product will be a mirror image of the original.
4. Print Your Artwork on Transfer Paper
Once you’ve printed your image, trim any excess transfer paper around the image. Anything left will be transferred onto the shirt.
5. Prewash the Shirt to Prevent Shrinkage

Pre-washing will prevent pulling on the edges of your image when the shirt is washed.
6. Place the Shirt on a Table or Other Hard Flat Surface
Use an iron to remove any creases or wrinkles in the fabric of your shirt. You want your design to be flush with the fabric for a smooth result when you put a picture on a shirt.
7. Peel the Backing Paper off the Transfer Paper
Carefully position the transfer paper on the shirt. Take your time with this so that you have the picture positioned just right!
8. Cover the Transfer Paper Using the Paper Backing You Peeled from the Transfer
This acts as a sort of parchment paper, however you can also use a soft kitchen towel.
9. Heat the Iron to the Temperature Recommended by the Transfer Paper Manufacturer
If you make the temperature too hot you may melt your transfer, or the design may not be opaque enough. If the heat is too low, the transfer may not adhere to the shirt properly.
10. Gently Move the Iron in a Circular Motion Starting in the Center of the Transfer
Move the iron to the edges of the image and back again, repeating for as long as the transfer instructions indicate. The process can take three or four minutes.
11. Let the Transfer Paper Cool Completely
Then, carefully peel up the parchment paper or towel, starting at one edge and moving quickly. Once cooled and the parchment paper is removed, the process is complete!
FAQs About Using Iron-On Transfers to Print a Picture on a T-Shirt
Q: Can I use a household iron instead of a hand-held machine like a Cricut EasyPress, a clamshell press or swinger/swing away heat press machine?
A: While sometimes successful, using a traditional clothes iron may hinder the results you would hope for. Often, the heat is not regulated properly or consistently. If you use a normal clothes iron, the transfers are likely to come off quicker than if you used a crafting or professional heat press. Investing in a small heat press intended for heat transfers is the best way to ensure a great outcome. We suggest the Cricut EasyPress Mini if you are only intending on doing small vinyl projects. It’s perfect for small apparel items like face masks, onesies, hats and also works well for chest designs on t-shirts. For larger garment decorating operations that venture outside of simply being a hobby, investing in a clamshell or swing press is advised.
Q: What are some of the best t-shirts for iron-on transfer projects?
A: While it’s always important to check your manufacturer's instructions on compatible products, there are a handful of t-shirts that are ideal for most iron-on transfers:
-
Preshrunk t-shirts in cotton or cotton/poly blends - you don’t want to drastic shrinking to warp your design or make the shirt unwearable
-
Gildan’s G64EZ0 Adult Softstyle EZ Print T-Shirt - it’s literally made for printing projects!
-
Enzyme washed tees - dye is broken down into smaller molecules that wash away easier - leaving a super smooth printing surface that materials bind well to.
-
Combed and ringspun cotton - so incredibly smooth to the hand and even more comfortable to wear!
Q: Will iron-on designs last through regular washing?
A: Your best bet for washing a shirt with vinyl transfers is by first making sure that your vinyl adheres very well to the fabric of the garment. Make sure you are using enough heat and pressure for a good bond, but not too much heat or pressure. Always check the manufacturer’s specifications before you start your project.
For washing instructions, we suggest either handwashing in cool water with a mild, diluted soap, or if you still want to machine wash, just make sure you follow a few rules:
-
Wash at cooler temperatures on the gentle cycle either alone, with other shirts or with delicates
-
You don’t want the edges of the vinyl to peel from rubbing against abrasive surfaces. Turning the vinyl side somewhat inside out will also help to protect the design
-
Use a mild detergent
-
Air dry if possible. If not possible, tumble dry on the lowest setting
What's Next After You Successfully Learn How to Print a Picture on a T-Shirt?
You did it! You learned how to print a picture on a t-shirt! If your first try didn't come out perfectly, don't fret! Practice makes perfect and it's always worth testing fabrics, other materials and methods to find out what works best for you.
If you master the skill of ironing a picture on a shirt you may want to move to the next step and invest in a printing press. They can be spendy but more efficient and can produce better prints. When you learn how to decorate t-shirts with a heat press, you will be able to create your designs quicker - allowing you to make more shirts. The heat is also more evenly distributed with a heat press versus an iron, so you may yield more professional looking results. You may also try your hand at heat pressing vinyl on clothing as well for another garment decoration method using a handheld iron or a heat transfer press. Learning how to print a picture on a t-shirt can be a process of trial and error, but a worthwhile one!
Beyond the choice of method, you could also try printing on other forms of clothing besides t-shirts such as sweatpants, sweatshirts, hats, and even cloth face masks. Luckily the first step is usually learning how to print on a shirt, once you've got that down - the possibilities are endless! Tell us any heat transfer tricks you may have up your sleeve in the comments below.
Comments
Jasa Konveksi Bandung01/07/2025 07:16 am
Your article is very inspiring with high-quality content. Warm Regard.
Reply
ShirtSpace01/09/2025 06:07 pm
Hi, Jasa! We are so happy you were inspired by our writing. Thanks so much for reading our blog.
Reply
Loudtrax03/10/2023 06:52 am
Thanks for posting this helpful blog.
Reply
ShirtSpace09/05/2023 05:37 pm
Thank you for reaching our blog. We appreciate it!
Reply
ochuko evidence02/02/2023 05:53 pm
First of all, thank you for letting me see this. I would appreciate it if you could post more good stuff in the future.
Reply
ShirtSpace02/02/2023 06:41 pm
Hi, Ochuko! Thanks for taking the time to read our blog.
Reply
sana09/06/2022 03:53 am
This is the perfect blog for anybody who really wants to find out about this topic.
Reply
ShirtSpace10/13/2022 06:59 pm
Hi Sana! Thank you for reading and taking the time to comment!
Reply
T-shirt supplier05/02/2021 06:24 am
Excellent coverage of this important topic. Your printing methods deserve praise. I would definitely recommend using these methods
Reply
ShirtSpace10/13/2022 06:59 pm
Hi! We are happy to hear you enjoyed our blog! Thank you so much for reading and taking the time to comment!
Reply
T-shirt Manufacturer04/29/2021 07:19 am
This article is creative and informative. I actually am looking for such a website for our company. Your details about printing a picture on a t-shirt with iron-on transfer will definitely help me.
Reply
ShirtSpace10/13/2022 07:00 pm
Hi! We are so excited to hear you found our blog informative and helpful. Thank you for reading!
Reply
Lisa Whaling01/29/2021 05:03 pm
When I used light transfer paper for a photo on alight shirt, the color of the shirt came through, and you could not see the photo. Is there a special type of transfer paper to use for photographs?
Reply
ShirtSpace08/17/2022 11:22 pm
Hello, Lisa! There are a few reasons that you could see the fabric of the shirt through the transfer and the photograph wasn’t as vibrant as you had hoped. The first could be that you are using old or worn out craft paper and/or parchment paper during the heat transfer process. Throw out craft paper as soon as it begins to become dull and throw out parchment paper when it starts to wrinkle or turn yellow. Bad paper will dull your transfer. Good craft paper will ensure that the design comes out more opaque. The second could be opacity issues. To fix this issue, try decreasing the pressure applied or the time the heat is applied. If the ink isn’t curing well to the garment, it could be a pressure related issue. For a better result, decrease the pressure used and time heat is applied. You could also be peeling the transfer at the wrong time. A hot peel transfer should be pulled away immediately (no more than 1-2 seconds). The last tips we have for you are to make sure you pre-wash and dry your shirt before you apply the transfers and make sure you are using good quality materials and equipment for the project. We found this video about common problems with heat transfers very helpful as well: https://www.youtube.com/watch?v=OBD9CSgYVm0 We hope this helps you produce the designs you were hoping for! Please let us know if there is anything else we can assist you with and best of luck with your apparel decoration projects.
Reply
Mari01/27/2021 03:00 pm
Are there special washing instructions so that the image doesn't fade or deteriorate?
Reply
ShirtSpace08/17/2022 11:21 pm
Hi, Mari! When it comes to actual washing practices, we suggest either handwashing in cool water with a mild, diluted soap or if you still want to machine wash, just make sure you follow a few rules. Wash at cooler temperatures on the gentle cycle either alone, with other shirts or with delicates. You don’t want the edges of the vinyl to peel from rubbing against abrasive surfaces. Turning the vinyl side somewhat inside out will also help to protect the design. Use a mild detergent. Air dry if possible. If not possible, tumble dry on the lowest setting. We hope this helps!
Reply
Maggie Jakeway 10/13/2020 05:06 am
Transfer on sure i bought is stiff and thick. How do i soften it? I really love shirt, but the transfer is so stiff Tytyty! Maggie Jakeway
Reply
ShirtSpace08/17/2022 10:52 pm
Hi, Maggie. We feel your frustration. There are few different things it could be. For one thing, it could be that the vinyl you are using is not a high quality product. Stahl’s.com is a good resource for vinyl supplies. Avid t-shirt makers often go through wholesalers for the best price for their vinyl supplies. Some other suggestions include heattransferwherehouse.com, theplugt-shirtstore.com, and avivawholesale.com. There are hot-split transfers on the market which are incredibly thin and soft. These will likely yield the results you are looking for. With these types of transfers, just keep in mind that the picture might be slightly less opaque and bleeding is more likely than with cold-peel transfers. Heat-press or iron-on transfers leave less ink on the garment and also bind the design directly to the fabric versus an adhesive bonding the two when using cold-peel vinyl. We aren’t sure what kind of vinyl you were using for your project, but cold-peel transfers notoriously give this thick stiffness problem sometimes and it’s often hard to fix. Another possible solution to your overly stiff and thick transfer problem is to place parchment or craft paper over the transfer again and reapply heat to the image again for a very short duration of time. Make sure to peel the paper off while it’s still hot. This may not completely fix the problem, but it’s worth a shot if you feel like you are that unhappy with the stiff/thick transfer that is currently on the shirt. You can also try taking some abrasive sandpaper to the transfer but you may just end up with cracking and peeling, so be prepared for a possibly ruined shirt if you go this route. On the other hand, you may end up with a beautifully distressed/vintage look to your transfer. There are vinyl removers on the market as well if you want to start from scratch. We hope this helps you either resolve your issue with your current shirt project, or at least prevent other vinyl mishaps in the future, best of luck!
Reply
Melba mulvihill09/13/2020 12:39 pm
My photos I transfer are stiff. Can I do anything to soften them?
Reply
ShirtSpace08/17/2022 11:16 pm
Hi, Melba. We are so sorry your heat transfer vinyl project didn’t come out how you would have hoped. There are a few different reasons this could be happening. First off, it could be that the vinyl you are using is not the best quality available. Sometimes you truly do get what you pay for when it comes to vinyl. Avid t-shirt makers often go through wholesalers for the best price for their vinyl supplies. T-shirt makers who often print usually go through wholesalers for competitive prices for their vinyl supplies. Stahl’s.com is a good resource for vinyl supplies. Some other suggestions include heattransferwherehouse.com, theplugt-shirtstore.com, and avivawholesale.com. These are just a handful, there are many more with a search engine query. We aren’t sure what kind of vinyl you used, but cold-peel transfers are sometimes too stiff, and it’s typically hard to fix. There are hot-split transfers sold, which are very thin and soft. These will likely result in a softer design on your tee. With hot-split transfers, just keep in mind that the picture might look less opaque (especially on dark-colored shirts). Bleeding is also more likely to happen than with cold-peel transfers. Heat-press or iron-on transfers leave less ink on the fabric. These kinds of transfers also adhere the design directly to the shirt, versus an adhesive bonding the two when using cold-peel vinyl. Another possible solution to your overly stiff transfers is to place parchment or craft paper over the transfer again and reapply heat to the image for a little more time. Make sure to peel the paper off while it’s still hot. This may not completely fix the problem, but if the shirt will likely be tossed anyways, it’s worth a go! You can try sandpaper as well, but you may get some cracking and peeling. On the flip side, it may just turn out looking vintage and distressed. There are also some vinyl removers on the market that have pretty good reviews if you want to just start completely over. We hope this information will either help you fix your stiff transfer, or at least prevent the problem from happening at all for future projects.
Reply
Victor 08/04/2020 12:05 pm
Thanks for the process! Please one question— if the t shirt happens to be brand new, is it still necessary to pre-wash?
Reply
Navy10/02/2022 06:45 pm
Yes, specifically if it's cotton fabric, then I recommend pre washing.
Reply
ShirtSpace08/17/2022 11:13 pm
Hi, Victor. You’re welcome, we are glad this blog post helped you understand how to iron a picture on a t-shirt. We do recommend you still pre-wash your shirt, even if it is brand new. This is to get any shrinkage out of the way before you apply the vinyl picture. Most shirts will shrink 3%-7% from their original size before washing. Even if you purchase a preshrunk shirt, there will always be some minimal shrinkage with washing. In addition to the shrinkage issue, if there are any sort of chemical agents on the shirt, then the washing helps. Sometimes manufacturers will coat shirts in a fabric softener type product to deter wrinkles during the shipping process. Not all companies do this, but it’s better to assume your shirt has it and pre-wash. If you want your heat transfer vinyl to have its best chance at a long-lasting, crisp and clean bond to the fabric, then pre-washing your shirt to get it closest to its final size will yield the best results. If you didn’t pre-wash your shirt before applying the vinyl transfer, the design could warp with the shrinking fabric and look puckered or uneven.
Reply
Matilda Gamby07/31/2020 05:09 pm
Thank You so much
Reply
ShirtSpace10/13/2022 07:03 pm
Hi Matilda! Thank you for reading and taking the time to comment!
Reply
maida07/11/2020 09:48 pm
Hi. Will these transfers stay on after a wash too?
Reply
ShirtSpace08/17/2022 11:06 pm
Hi, Maida. This is a very good question. Your best bet for washing a mask with vinyl transfers is by first making sure that your vinyl adheres very well to the fabric of the mask. Make sure you are using enough heat and pressure for a good bond, but not too much heat or pressure. Always check the manufacturer’s specifications before you start your project. Using a traditional clothes iron may also hinder the results you would hope for. Often, the heat is not regulated properly or consistently. We suggest the Cricut Easy Press Mini if you are only intending on doing small vinyl projects. It’s perfect for small projects like face masks, onesies, or hats. If you use a normal clothes iron the transfers are likely to come off. Investing in a small press intended for heat transfers is the best way to ensure a great outcome. When it comes to actual washing practices, we suggest either handwashing in cool water with a mild, diluted soap. Or if you still want to machine wash, just make sure you follow a few rules. Wash at cooler temperatures on the gentle cycle either alone, with other shirts or with delicates. You don’t want the edges of the vinyl to peel from rubbing against abrasive surfaces. Turning the vinyl side somewhat inside out will also help to protect the design. Use a mild detergent. Air dry if possible. If not possible, tumble dry on the lowest setting. We hope this helps!
Reply
Mohamed Mubarek Yosuf07/07/2020 11:38 pm
Does it work
Reply
ShirtSpace09/05/2023 05:47 pm
Hi, Mohamed. Thank you for reading our blog. This method might not be best for large-scale t-shirt printing, but for beginners who want to do small projects before investing in a heat press – an iron can be a great starting point and work for very small prints! We hope this clears things up a bit!
Reply
kalei06/17/2020 03:09 pm
DOES IT WORK?
Reply
ShirtSpace09/05/2023 05:46 pm
Hello, Kalei. It most certainly does work. Heat presses are best, because irons typically have little holes on the bottom of the heated plate that release steam. This means that the heat is not evenly distributed throughout the plate. Even heat and pressure yield best results. But in a pinch, and with a very small design, an iron can work great!
Reply
Amber Waltermier06/04/2020 12:20 pm
Hi just got into this craft an i can not find transfer paper or whatever i need to print the pictures on to. Can you help me! Your blog helped me understand more into this just need to know what printer paper i need
Reply
ShirtSpace10/13/2022 07:10 pm
Hi Amber! The paper you need foe this craft is Printable Iron Transfer Paper. Thank you so much for reading and taking the time to comment!
Reply
Morgan05/22/2020 12:38 pm
Is there any specific washing instructions for after transferring the picture onto the shirt?
Reply
ShirtSpace10/13/2022 07:24 pm
Hi Morgan! We have a youtube video that explains how to care for the shirt after heat transferring. Here is a link for the video: https://www.youtube.com/watch?v=mSeUq_DM8pk . Thank you for reading and taking the time to comment!
Reply
King04/17/2020 04:48 pm
Wow
Reply
ShirtSpace01/09/2025 06:10 pm
Hi, King! Glad it had the “wow factor” for you :) Thanks for reading our blog.
Reply
Brian Kamelang04/05/2020 11:25 am
Hi, didn't know where to find information concerning printing images onto the shirts. After this information I have a better understanding to print using the transfer or the sublimation paper.
Reply
ShirtSpace10/13/2022 07:25 pm
Hi Brian! We are so happy to hear our blog gave you a better understanding on how to to print using the transfer or the sublimation paper. Thank you for reading!
Reply
printlandokhla02/28/2020 05:12 am
I think this is one of the best blog for me because this is really helpful for me. Thanks for sharing this valuable information for free.
Reply
ShirtSpace10/13/2022 07:27 pm
Hi! Thank you for reading and taking the time to comment!
Reply
german02/21/2020 12:02 pm
I have been having issues with finding the best T-shirts for myself. After reading this article, my issues has come to an end. I really love the information you provided here as it has helped me a lot. merely looking at the article, i can see that it is written by a PRO. please check my article on and give me valuable feedback. Thanks for the good write-up.
Reply
ShirtSpace09/05/2023 05:37 pm
Hi German! We're so happy to hear that our article helped you in your efforts to find the best t-shirts for yourself! We appreciate you taking the time to leave a comment. Please let us know if there is ever anything that we can help you with.
Reply
Ixchel Cisneros01/28/2020 03:47 am
Hi! So I just finished Ironing on my image to my sweater but have fun into a bit of a problem. So this was my first time doing this, so maybe I just did something wrong, but the image I printed out was mostly white and when I finished transferring the image to my sweater, it came out brown. Do you happen to have any ideas at to what I did wrong?
Reply
ShirtSpace09/05/2023 05:38 pm
Hi Ixchel! Great job on ironing on your first transfer! Are you using parchment paper or a Teflon sheet? It sounds like your heat may have been too high, which is why you're showing a brown color on your transfer. If you didn't use parchment paper, we would suggest giving that a try. If you did use parchment paper, we would recommend reducing the heat. We hope this helps, but please reach out if you have any additional questions!
Reply
Leave a Comment
We take your privacy seriously and will not share or publish your email address.
This site is protected by reCAPTCHA and the Google Privacy Policy and Terms of Service apply.